はじめに
nginxを用いたリバースプロキシサーバーの構築方法とSSL証明書を作成し、Httpsでの通信を確立する方法を紹介します。
前提知識
nginxとは
nginxは、フリーかつオープンソースなWebサーバである。処理性能・高い並行性・メモリ使用量の小ささに焦点を当てて開発されており、HTTP, HTTPS, SMTP, POP3, IMAPのリバースプロキシの機能や、ロードバランサ、HTTPキャッシュなどの機能も持つ。 https://www.nginx.co.jp
リバースプロキシとは
リバースプロキまたは逆プロキシは、特定のサーバへのリクエストが必ず通過するように設置されたプロキシサーバである。一般的なプロキシとは逆で、不特定多数のクライアントのアクセスに備えて特定のサーバー専用に設けられる。クライアントに取ってはサービスの窓口として機能し、普通はクライアントがリバースプロキシを意識することはない。 リバースプロキシは、不特定多数のクライアントに対するアクセス制限や、サーバーの負荷分散のために用意される。 https://ja.wikipedia.org/wiki/リバースプロキシ
HTTPとは
Hypertext Transfer Protocol(ハイパーテキスト・トランスファー・プロトコル、略称 HTTP)とは、WebブラウザがWebサーバと通信する際に主として使用する通信プロトコルであり、インターネット・プロトコル・スイートのメンバである。HTMLなどのテキストによって記述されたWebページ等のコンテンツの送受信に用いられる。 https://developer.mozilla.org/ja/docs/Web/HTTP
HTTPSとは
HTTPS(Hypertext Transfer Protocol Secure)は、HTTPによる通信をより安全に(セキュアに)行うためのプロトコルおよびURIスキームである。厳密に言えば、HTTPS自体はプロトコルではなく、SSL/TLSプロトコルによって提供されるセキュアな接続の上でHTTP通信を行うことをHTTPSと呼んでいる。 https://developer.mozilla.org/ja/docs/Glossary/https
SSL/TLSとは
Transport Layer Security(トランスポート・レイヤー・セキュリティ、TLS)は、インターネットなどのコンピュータネットワークにおいてセキュリティを要求される通信を行うためのプロトコルである。主な機能として、通信相手の認証、通信内容の暗号化、改竄の検出を提供する。TLSはIETFによって策定された。 当プロトコルは(特に区別する場合を除いて)SSL (Secure Sockets Layer) と呼ばれることも多い。これは、TLSの元になったプロトコルがSSLであり、そのSSLという名称が広く普及していることによる。 https://www.soumu.go.jp/main_sosiki/joho_tsusin/security_previous/kiso/k01_ssl.htm
ドメインとは
ドメインとは、「インターネット上の住所表示」として例えられます。電子メールを送ったり、ウェブサイトを閲覧する際に相手を特定するために必要になります。 例えば、URLが「https://www.onamae.com/」であればドメイン名は「onamae.com」です。 https://www.onamae.com/clever/about/domain.html
CentOS8の構築
こちらを参考に最小限のCentOS8の構築、起動を行ってください。 今回は、ホスト名を「ReverseProxyServer」として構築しました。
https://www.munenick.me/blog/esxi-centos8
nginxのインストールと起動
nginxのインストール
以下のコマンドを入力し、nginxをインストールする
[root@ReverseProxyServer ~]# dnf -y install nginxnginxの起動
以下のコマンドを入力し、nginxを起動する
[root@ReverseProxyServer ~]# systemctl enable nginx
[root@ReverseProxyServer ~]# systemctl start nginx
nginxの起動確認
以下のコマンドを入力し、nginxが起動していることを確認する
[root@ReverseProxyServer ~]# systemctl status nginx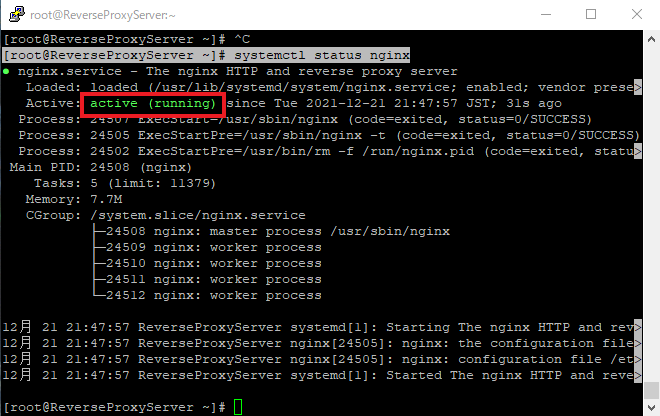
ファイヤーウォール
ファイヤーウォールの設定
以下のコマンドを入力し、httpのファイヤーウォールを設定する ※「–add-service=http」でhttpのファイヤーウォールを開けることを意味し、「–permanent」で恒久的にファイヤーウォールを開放することを意味している。
[root@ReverseProxyServer ~]# firewall-cmd --add-service=http --permanent
[root@ReverseProxyServer ~]# firewall-cmd --reload
ファイヤーウォールの確認
以下のコマンドを入力し、ファイヤーウォールの設定ができていることを確認する
[root@ReverseProxyServer ~]# firewall-cmd --list-all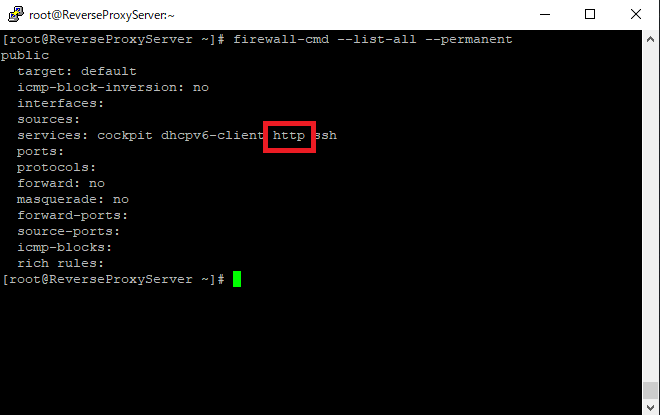
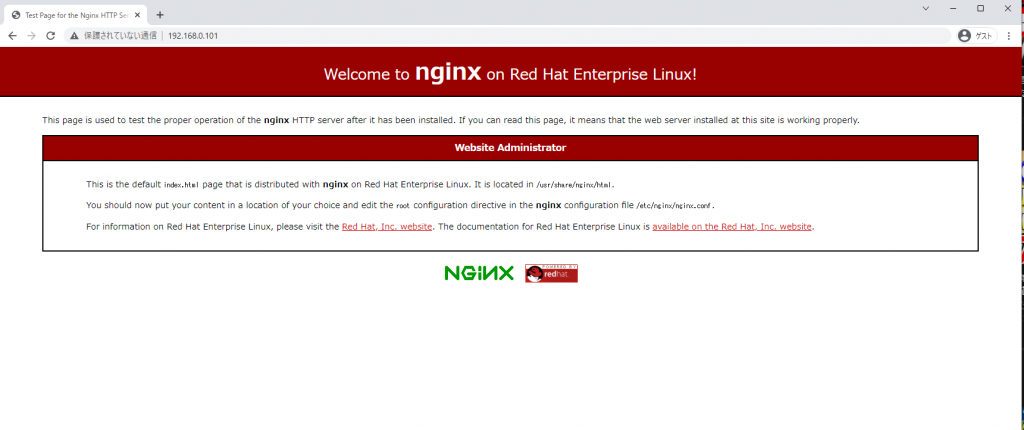
ブラウザから確認
ブラウザの「 http://リバースプロキシサーバのIPアドレス 」を入力し、サイトにアクセスできることを確認する
リバースプロキシの設定
リバースプロキシのコンフィグ
- 以下のコマンドを入力し、コンフィグファイル保存用のディレクトリに移動する
[root@ReverseProxyServer ~]# cd /etc/nginx/conf.d- 以下のコマンドを入力し、コンフィグファイルを作成する
[root@ReverseProxyServer ~]# vi reverseproxy.conf- 以下の内容をコンフィグファイルの中に記述する 今回は例として、リバースプロキシの先にGoogleのサイトを指定する
server {
listen 80;
server_name このサーバのIPアドレス;
proxy_set_header X-Real-IP $remote_addr;
proxy_set_header X-Forwarded-Proto $scheme;
proxy_set_header X-Forwarded-For $proxy_add_x_forwarded_for;
proxy_set_header Host $host;
location / {
proxy_pass https://www.google.com;
}
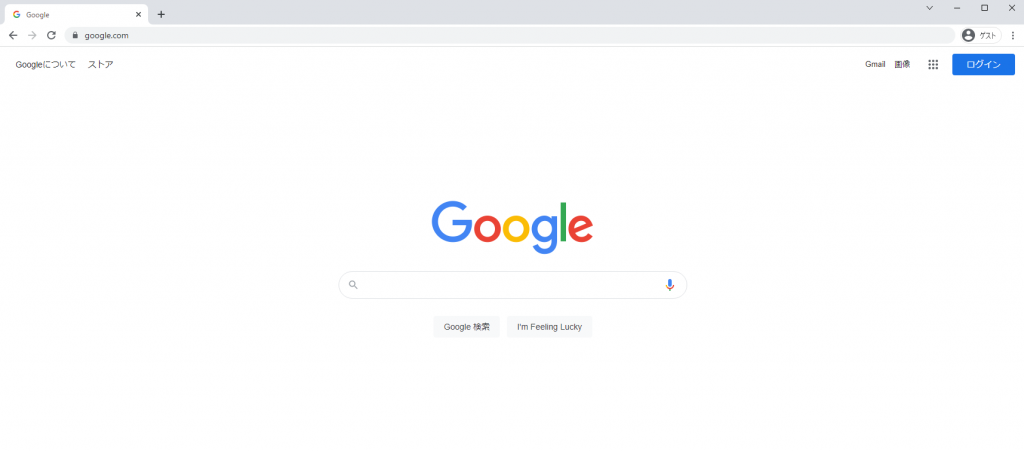
}ブラウザから確認
再度、ブラウザの「 http://リバースプロキシサーバのIPアドレス 」を入力し、NginxのページではなくGoogleのホームページが開くことを確認する
SSLの有効化
この作業を行う場合、ドメインの取得が必須となります。Google Domainsやお名前.comなどでドメインを取得後、この作業を行ってください。また、ドメイン取得は有料ですのでご注意ください。
certbotのインストール
以下のコマンドを入力し、certbotをインストールする ※certbotはデフォルトのリポジトリにはないため、「epel-release」というリポジトリをインストールしている
[root@ReverseProxyServer ~]# dnf -y install epel-release
[root@ReverseProxyServer ~]# dnf -y install certbot python3-certbot-nginx
コンフィグの編集
以下のコマンドを実行し、「server_name」を「サーバのIPアドレス」から「自身のドメイン」へ変更する
[root@ReverseProxyServer ~]# vi /etc/nginx/conf.d/reverseproxy.conf

server {
  listen 80;
  server_name 自身のドメイン; ←ここを編集する

  proxy_set_header X-Real-IP $remote_addr;
  proxy_set_header X-Forwarded-Proto $scheme;
  proxy_set_header X-Forwarded-For $proxy_add_x_forwarded_for;
  proxy_set_header Host $host;


  location / {
    proxy_pass https://www.google.com;
  }
}
ポート開放
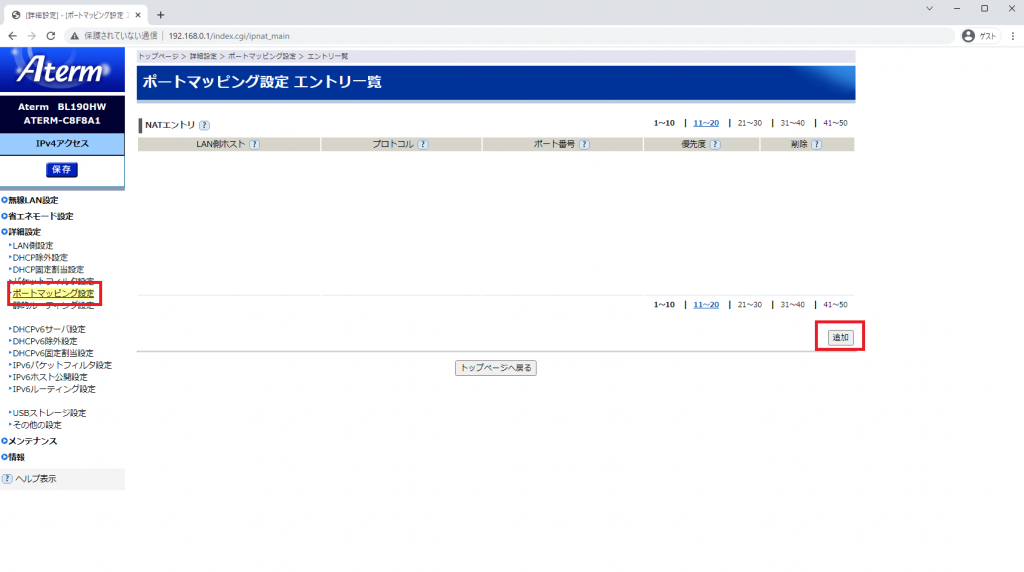
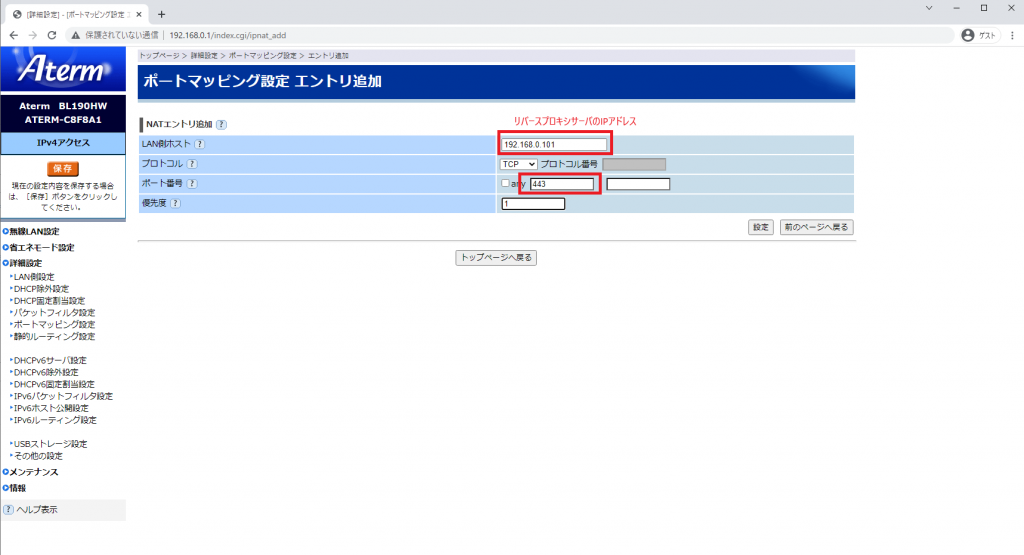
自身のルータへアクセスし、このサーバーの443番ポートを開放する ※ 例としてAtermというルータのポート開放手順を示す(ルータは環境によって異なるため、各自調べながら作業を行ってください。) ※※ ポート開放を行うことで、不特定多数からのアクセスが可能になりますので、危険性を理解し、ご自身の責任の上、作業を行ってください。
証明書の発行
以下のコマンドを実行し、SSL証明書を発行する
[root@ReverseProxyServer ~]# certbot --nginx

Enter email address (used for urgent renewal and security notices)
 (Enter 'c' to cancel): 自身のメールアドレスを入力する

- - - - - - - - - - - - - - - - - - - - - - - - - - - - - - - - - - - - - - - -
Please read the Terms of Service at
https://letsencrypt.org/documents/LE-SA-v1.2-November-15-2017.pdf. You must
agree in order to register with the ACME server at
https://acme-v02.api.letsencrypt.org/directory
- - - - - - - - - - - - - - - - - - - - - - - - - - - - - - - - - - - - - - - -
(Y)es/(N)o: Y ←同意した場合はYを入力する


- - - - - - - - - - - - - - - - - - - - - - - - - - - - - - - - - - - - - - - -
Would you be willing, once your first certificate is successfully issued, to
share your email address with the Electronic Frontier Foundation, a founding
partner of the Let's Encrypt project and the non-profit organization that
develops Certbot? We'd like to send you email about our work encrypting the web,
EFF news, campaigns, and ways to support digital freedom.
- - - - - - - - - - - - - - - - - - - - - - - - - - - - - - - - - - - - - - - -
(Y)es/(N)o: N    ← 設定したメールアドレス宛にメールを送信していいかを聞いている

Please choose whether or not to redirect HTTP traffic to HTTPS, removing HTTP access.
- - - - - - - - - - - - - - - - - - - - - - - - - - - - - - - - - - - - - - - -
1: No redirect - Make no further changes to the webserver configuration.
2: Redirect - Make all requests redirect to secure HTTPS access. Choose this for
new sites, or if you're confident your site works on HTTPS. You can undo this
change by editing your web server's configuration.
- - - - - - - - - - - - - - - - - - - - - - - - - - - - - - - - - - - - - - - -
Select the appropriate number [1-2] then [enter] (press 'c' to cancel): 2
Redirecting all traffic on port 80 to ssl in /etc/nginx/conf.d/default.conf

IMPORTANT NOTES:
 - Unable to install the certificate
 - Congratulations! Your certificate and chain have been saved at:
   /etc/letsencrypt/live/*****/fullchain.pem
   Your key file has been saved at:
   /etc/letsencrypt/live/****/privkey.pem
   Your cert will expire on 2020-12-31. To obtain a new or tweaked
   version of this certificate in the future, simply run certbot again
   with the "certonly" option. To non-interactively renew *all* of
   your certificates, run "certbot renew"
 - Your account credentials have been saved in your Certbot
   configuration directory at /etc/letsencrypt. You should make a
   secure backup of this folder now. This configuration directory will
   also contain certificates and private keys obtained by Certbot so
   making regular backups of this folder is ideal.
コンフィグの編集
以下のコマンドを入力し、リバースプロキシのコンフィグファイルファイルを編集し、SSLに対応させる
[root@ReverseProxyServer ~]# vi /etc/nginx/conf.d/reverseproxy.conf

server {
  listen 80;
  server_name 自身のドメイン名;

  rewrite ^(.*)$ https://$host$1 permanent;
}

server {
  listen 443 ssl;
  server_name 自身のドメイン名;

  ssl_certificate     /etc/letsencrypt/live/自身のドメイン名/fullchain.pem;
  ssl_certificate_key /etc/letsencrypt/live/自身のドメイン名/privkey.pem;

  proxy_set_header X-Real-IP $remote_addr;
  proxy_set_header X-Forwarded-Proto $scheme;
  proxy_set_header X-Forwarded-For $proxy_add_x_forwarded_for;
  proxy_set_header Host $host;

  location / {
    proxy_pass https://www.google.com;
  }
}
ファイヤーウォールの設定
以下のコマンド入力し、httpsのファイヤーウォールを設定する
[root@ReverseProxyServer ~]# firewall-cmd --add-service=https --permanent
[root@ReverseProxyServer ~]# firewall-cmd --reload
ファイヤーウォールの確認
以下のコマンド入力し、ファイヤーウォールの設定を確認する
[root@ReverseProxyServer ~]# firewall-cmd --list-all --permanent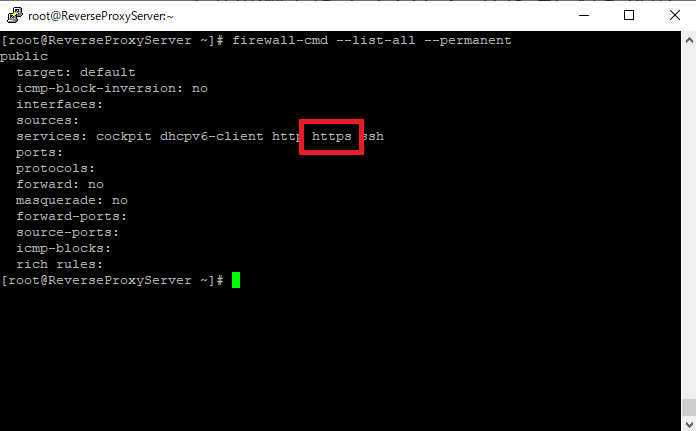
ブラウザから確認
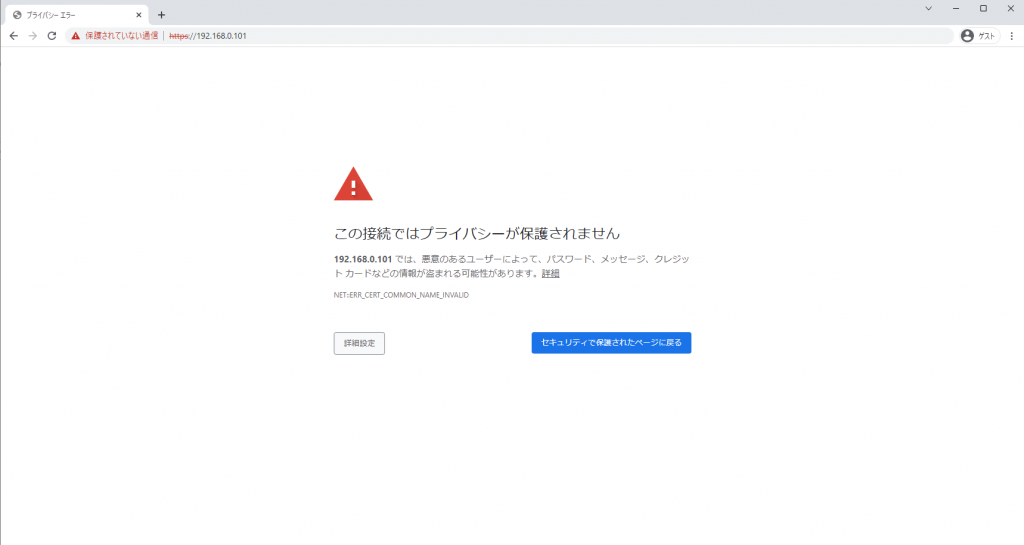
- 「詳細設定」→「サイトにアクセスする」をクリックし、Googleのホームページが開くことを確認する
※ドメインがこのサーバーのグローバルIPを解決できる場合は、外部ネットワークから、「https://自身のドメイン名」でアクセスすることができる
以上でリバースプロキシサーバーの構築とSSLの有効化は終了でお疲れさまでした。
おわりに
今回はリバースプロキシサーバーの構築とSSLの有効化を紹介しました。今後、アプリケーションサーバー等を作成した際、このリバースプロキシサーバーを介して設定を行いますのでご承知お願いします。
また、今回から外部からのアクセスを可能にするためにルータのポート開放等を行います。ご自身でポート開放について調べていただき、危険性等を承知の上、構築をしてください。どうかよろしくお願いいたします。